Hello World KitchenBeta
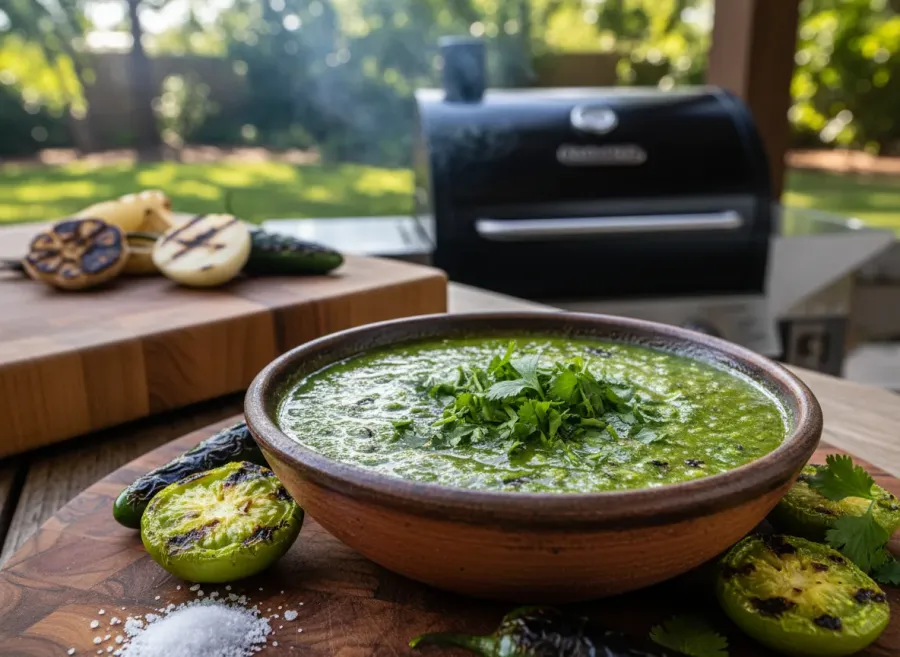
A smoky, vibrant, and spicy green salsa made with grill-charred tomatillos and jalapeños. This recipe is specifically formulated and safely acidified for water-bath canning so you can enjoy the taste of summer all year long.
Ingredients
Produce
- 5 lbs Tomatillos — husks removed and rinsed well to remove stickiness
- 6 whole Jalapeño peppers — leave whole for grilling; use fewer for milder salsa
- 1 large White onion — peeled and cut into thick 1/2-inch rounds
- 6 cloves Garlic — leave skins on for grilling to protect the flesh
- 1 cup Fresh cilantro — loosely packed, roughly chopped
Seasoning & Acidification
- 4 tablespoons Bottled lime juice — MUST be bottled (commercial) to ensure consistent acidity for safe canning
- 2 teaspoons Canning or pickling salt — adjust to taste; do not use table salt as it contains anti-caking agents
- 1 teaspoon Ground cumin (optional) — adds depth to the smoky flavor
Instructions
-
Prepare your water-bath canner. Fill the canner halfway with water and bring to a simmer. Wash 4 pint jars, lids, and bands in hot soapy water. Keep the jars hot by submerging them in the simmering canner water until ready to use.
~15 minKeeping jars hot prevents them from cracking when filled with hot salsa. -
Preheat your outdoor grill to medium-high heat (about 400°F - 450°F).
~10 minIf you don't have an outdoor grill, you can broil the vegetables in the oven on a foil-lined baking sheet. -
Place the whole tomatillos, jalapeños, onion rounds, and unpeeled garlic cloves directly onto the grill grates. Grill, turning occasionally, until the vegetables are soft and charred on all sides. Garlic will take about 5-7 minutes, jalapeños and onions 10-12 minutes, and tomatillos 12-15 minutes.
~15 minDon't worry if the tomatillos burst slightly; just carefully transfer them to a bowl using tongs to catch the juices. -
Transfer the charred vegetables to a large bowl and let cool slightly. Squeeze the roasted garlic cloves out of their skins. Cut the stems off the jalapeños. (For a milder salsa, slice the jalapeños open and scrape out the seeds).
~5 minWear gloves when handling roasted jalapeños if you are sensitive to capsaicin. -
Working in batches if necessary, place the roasted tomatillos (and any collected juices), jalapeños, onions, garlic, cilantro, canning salt, and cumin into a food processor or blender. Pulse until you reach your desired consistency (chunky or smooth).
~5 minDo not add the bottled lime juice yet; it will be added directly to the jars to ensure perfectly safe acidity levels in every jar. -
Transfer the blended salsa to a large saucepan. Bring to a rolling boil over medium-high heat, stirring frequently to prevent sticking. Once boiling, reduce heat and simmer for 5 minutes.
~10 minThis 'hot pack' method removes air from the food tissues, helps keep the jars from floating, and ensures a better vacuum seal. -
Carefully remove the hot jars from the canner. Add 1 tablespoon of bottled lime juice into the bottom of each empty pint jar.
~2 minUsing bottled lime (or lemon) juice is a USDA requirement for canning tomatillos due to their fluctuating natural pH. -
Ladle the hot salsa into the hot jars using a canning funnel, leaving 1/2 inch of headspace at the top.
~3 min -
Remove air bubbles by running a bubble popper or plastic chopstick down the inside edges of the jars. Wipe the jar rims clean with a damp paper towel. Center the lids on the jars and screw on the bands until fingertip-tight.
~2 minWiping the rim is crucial; any salsa residue will prevent a proper seal. -
Using a jar lifter, carefully lower the filled jars back into the water-bath canner. Ensure jars are completely covered by at least 1-2 inches of water. Bring water to a vigorous boil and process for 15 minutes (adjust time for altitude if above 1,000 ft).
~15 minStart your timer only after the water has reached a full rolling boil. -
Turn off the heat, remove the canner lid, and let the jars sit in the water for 5 minutes. Then, use the jar lifter to remove the jars, placing them upright on a towel-lined countertop. Let them rest undisturbed for 12 to 24 hours.
~24hYou should hear the satisfying 'ping' of the lids sealing as they cool.
Nutrition
Equipment
- Outdoor Grill
- Water-bath Canner
- 4 Pint Canning Jars with New Lids and Bands
- Jar Lifter
- Canning Funnel
- Bubble Popper or Chopstick
- Food Processor or Blender
- Large Saucepan
Tips & Storage
- Never substitute fresh lime juice for bottled when canning. Fresh citrus varies in acidity, whereas commercial bottled juice has a standardized pH level required for food safety.
- If you want to alter the proportions of peppers, onions, or tomatillos, do not increase the total amount of low-acid ingredients (peppers/onions) relative to the tomatillos.
- Altitude adjustments: Add 5 minutes to processing time for 1,001-3,000 ft, 10 minutes for 3,001-6,000 ft, and 15 minutes for above 6,000 ft.
- If a jar fails to seal after 24 hours (the center of the lid flexes up and down), store it in the refrigerator and consume within 2 weeks.
- Storage: Store sealed jars in a cool, dark, and dry place (like a pantry or basement) for up to 12-18 months. Once a jar is opened, store it in the refrigerator and consume within 2 weeks.
Tags
🤖 This recipe was created with AI assistance. If you spot a mistake or something that doesn't look right, please report it.