 Hello World KitchenBeta
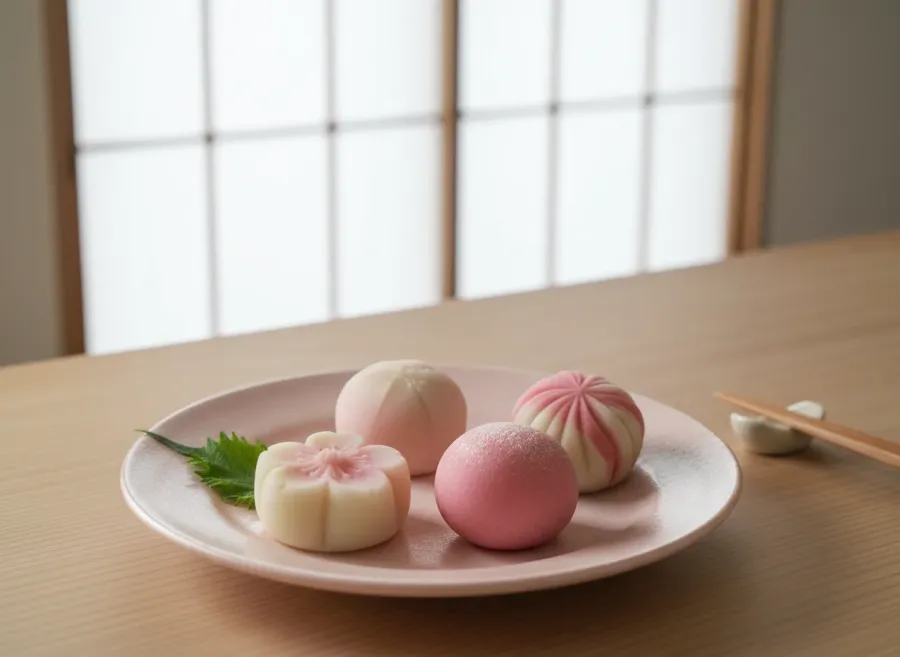
An expert-level guide to crafting exquisite traditional Japanese sweets. This recipe covers making shiroan (sweetened white bean paste) and gyuhi (soft mochi) from scratch, blending them into a smooth nerikiri dough, and sculpting it into delicate, seasonal cherry blossom (sakura) shapes.
Ingredients
Shiroan (White Bean Paste)
- 250 g Dried white beans (cannellini, baby lima, or tebo beans) — Rinsed well
- 200 g Granulated white sugar — Adjust to taste, but high sugar preserves the paste
- 0 as needed Water — For boiling and soaking
Gyuhi (Soft Mochi Binder)
- 20 g Shiratamako (glutinous rice flour) — Do not substitute with regular rice flour
- 20 g Granulated sugar
- 30 ml Water
Filling and Decoration
- 180 g Koshian (smooth red bean paste) — Divided into 15g balls
- 1 dash Food coloring (gel or natural powders) — Pink and yellow for sakura design
Instructions
-
Soak the dried white beans in plenty of cold water overnight (at least 12 hours). The beans will double in size.
~10 minMake sure there is at least 3 inches of water above the beans, as they absorb a lot of liquid. -
Drain the beans. Place them in a large pot, cover with fresh water, and bring to a boil. Boil for 5 minutes, then drain and rinse the beans. This process, called 'shibunuki', removes astringency.
~15 minIf the beans are particularly old or strong-tasting, repeat this boiling and draining step a second time. -
Return the beans to the pot, cover with plenty of fresh water, and simmer gently over low heat until they are extremely soft and easily crushed between your fingers (about 1.5 to 2 hours). Skim any foam that rises to the top.
~2hDo not let the beans boil vigorously, as this will break the skins and make the paste cloudy. -
Drain the cooked beans. Working in batches, press the warm beans through a fine mesh sieve using a wooden spatula. The skins will remain in the sieve; discard them.
~20 minA traditional uragoshi (horsehair or fine wire sieve) yields the silkiest texture. -
Place the strained bean purée into a clean cotton cloth (sarashi) set over a bowl. Squeeze the cloth tightly to extract as much excess water as possible. You are left with 'naman', raw bean paste.
~10 minThe drier the naman, the easier it will be to cook the sugar in. -
Transfer the naman to a heavy-bottomed pot. Add the 200g of sugar. Cook over medium-low heat, stirring constantly with a wooden spatula. The mixture will initially loosen, then thicken. Cook until you can draw a line that holds its shape, and the paste forms a stiff peak when dropped. Transfer to a flat tray to cool completely. This is your Shiroan.
~25 minDivide the hot paste into small portions on the cooling tray to speed up the process and prevent condensation. -
Prepare the Gyuhi: In a small microwave-safe bowl, whisk the shiratamako and 30ml water until perfectly smooth. Mix in the 20g sugar. Cover loosely and microwave for 1 minute. Stir vigorously with a wet spatula. Microwave for another 30 seconds until the mixture is translucent, sticky, and stretchy.
~5 minIf you don't have a microwave, you can steam the mixture for 10-15 minutes until translucent. -
Make the Nerikiri Dough: Place 300g of the cooled Shiroan into a non-stick pan over low heat. Add the warm Gyuhi to the pan. Knead them together over the heat using a wooden spatula. Continue to cook and fold until the mixture is thoroughly combined, no longer sticks to your fingers, and feels like soft modeling clay.
~15 minTest the consistency by pinching a piece; it should hold a shape without being sticky. If it feels too wet, continue cooking briefly. -
Turn the nerikiri dough out onto a clean, lint-free cloth. Using the cloth, gently knead the dough to cool it down, making it exceptionally smooth and pliable. Keep it covered with a damp cloth to prevent drying out.
~5 minTearing the dough into small pieces and bringing it back together helps it cool quickly and evenly. -
Divide the nerikiri dough. Reserve a tiny piece (about 5g) and tint it yellow for the flower centers. Tint the majority of the dough a delicate pale pink using food coloring. Knead the color in thoroughly until uniform.
~10 minUse a toothpick to add gel food coloring a tiny bit at a time. Wagashi colors should be muted and pastel, reflecting nature. -
Divide the pink nerikiri into 12 equal portions (about 25g each). Divide the koshian (smooth red bean paste) into 12 equal portions (15g each) and roll them into balls.
~5 minKeep all portions covered with a damp cloth while working. -
Flatten a pink nerikiri portion into a 2-inch disk, thinner at the edges. Place a koshian ball in the center. Gently push the nerikiri up around the filling to encase it completely. Pinch the seam closed and roll into a smooth, slightly flattened dome.
~15 minUse the web of your hand to smoothly push the dough upwards without trapping air. -
Sculpt the Sakura: Using a sankaku-bera (triangular wooden tool) or the dull back of a butter knife, press 5 equidistant indentations into the sides and top of the dome to divide it into 5 petals. Pinch the outer edge of each petal slightly to form the characteristic cherry blossom notch.
~15 minKeep your tools slightly damp to prevent sticking. -
Press a small indentation in the center of the blossom. Using a fine sieve, push the yellow nerikiri through to create 'stamen' threads. Use a bamboo skewer to pick up a tiny cluster of the yellow threads and place it in the center indentation. Repeat for all 12 wagashi.
~10 minAlternatively, you can just roll a tiny yellow ball for the center, but the sieve method looks beautifully realistic.
Nutrition
Equipment
- Fine mesh sieve (uragoshi)
- Clean cotton cloth (sarashi)
- Heavy-bottomed pot
- Non-stick frying pan
- Wooden spatula (shamoji)
- Wagashi sculpting tool (sankaku-bera or triangular wooden stick)
- Small bamboo skewer
- Steamer or microwave
- Kitchen scale
Tips & Storage
- Hygiene is critical: Wagashi spoils easily. Ensure all cloths, tools, and hands are impeccably clean.
- Do not let the nerikiri dry out. Always keep any dough you are not actively working on covered with a damp (but well-wrung) towel.
- If your nerikiri dough feels too hard, you can knead a few drops of water into it. If it is too soft, knead it over a warm pan for a few minutes to evaporate moisture.
- Serve alongside a bowl of freshly whisked hot matcha. The sweetness of the wagashi beautifully counterbalances the bitterness of the tea.
- Storage: Store the finished wagashi in an airtight container in the refrigerator for up to 3 days. Bring to room temperature 30 minutes before serving for the best texture. They can also be frozen for up to 1 month; thaw at room temperature before eating.
Tags
🤖 This recipe was created with AI assistance. If you spot a mistake or something that doesn't look right, please report it.


