Hello World KitchenBeta
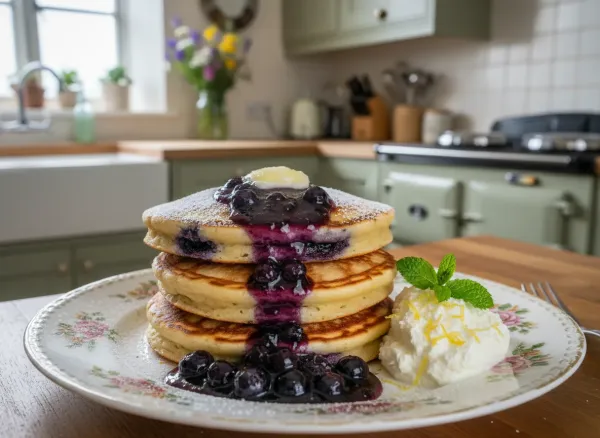
Thick, tender, and incredibly fluffy buttermilk pancakes that are perfect for a weekend breakfast. This beginner-friendly recipe guarantees golden-brown edges and a soft, airy center.

Ingredients
Dry Ingredients
- 2 cups all-purpose flour — spooned and leveled
- 3 tablespoons granulated sugar
- 2 teaspoons baking powder — ensure it is fresh for the best rise
- 1 teaspoon baking soda — reacts with buttermilk for fluffiness
- 0.5 teaspoon kosher salt
Wet Ingredients
- 2 cups buttermilk — room temperature is best
- 2 whole large eggs — room temperature
- 0.25 cup unsalted butter — melted and slightly cooled
- 1 teaspoon vanilla extract
For Cooking
- 2 tablespoons unsalted butter or neutral oil — for greasing the pan
Instructions
-
In a large bowl, whisk together the flour, sugar, baking powder, baking soda, and salt until evenly combined.
~2 minWhisking dry ingredients thoroughly prevents pockets of baking soda that can taste bitter. -
In a separate medium bowl, whisk the buttermilk, eggs, melted butter, and vanilla extract until smooth.
~2 minIf your buttermilk is cold, slowly drizzle in the melted butter while whisking to prevent the butter from solidifying into clumps. -
Pour the wet ingredients into the dry ingredients. Use a spatula to gently fold the mixture together until just combined. Do not overmix; lumps are perfectly fine and expected.
~1 minOvermixing develops gluten, which leads to tough, flat pancakes. Stop mixing as soon as you no longer see dry flour streaks. -
Let the batter rest undisturbed at room temperature for 10 minutes.
~10 minResting is crucial! It gives the flour time to hydrate and the baking powder/soda time to activate, resulting in maximum fluffiness. -
While the batter rests, heat a griddle or large nonstick skillet over medium-low heat. Once warm, lightly grease with a little butter or oil, wiping away any excess with a paper towel.
~5 minTemperature management is key. If the pan is too hot, the outside will burn before the inside cooks. A medium-low heat allows the pancakes to cook evenly and rise gently. -
Using a 1/4 cup measuring cup or a ladle, scoop the batter onto the hot pan, leaving an inch or two between each pancake.
~2 min -
Cook until the edges look set and dry, and bubbles begin to form and pop on the surface (about 2 to 3 minutes).
~3 minWait for the bubbles to pop and stay open before flipping; this indicates the structural integrity is ready for a flip. -
Flip carefully with a flat spatula and cook the other side until golden brown (about 1 to 2 minutes more). Remove to a warm plate and repeat with the remaining batter.
~10 minNever press down on the pancakes with your spatula after flipping! That will press all the airy fluffiness right out of them.
Nutrition
Equipment
- large mixing bowl
- medium mixing bowl
- whisk
- silicone spatula
- griddle or large nonstick skillet
- 1/4 cup measuring cup or ladle
- flat turner spatula
Tips & Storage
- To keep pancakes warm while cooking batches, place them on a wire rack set over a baking sheet in a 200°F (95°C) oven.
- For the lightest texture, ensure your baking powder and baking soda are not expired.
- If you don't have buttermilk, make a quick substitute: mix 2 cups of milk with 2 tablespoons of white vinegar or lemon juice. Let it sit for 5 minutes before using.
- Wipe the pan clean with a paper towel between batches to prevent residual butter from burning.
- Storage: Store leftover pancakes in an airtight container in the refrigerator for up to 3 days. To freeze, lay them flat on a baking sheet to freeze individually, then transfer to a freezer bag for up to 2 months. Reheat in a toaster or oven.
Tags
🤖 This recipe was created with AI assistance. If you spot a mistake or something that doesn't look right, please report it.